Best BlueStacks Settings for Gaming (Honest Guide)
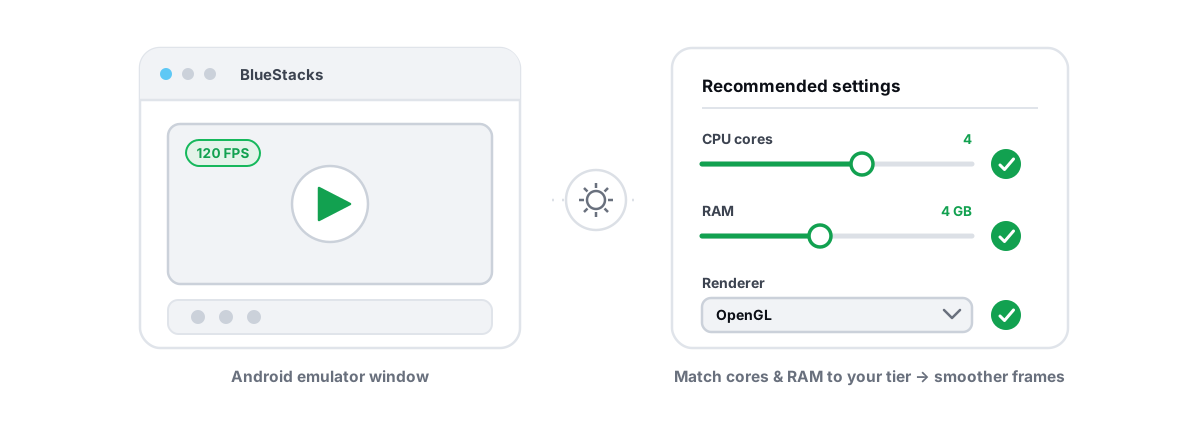
The best BlueStacks settings for gaming are the boring, mechanical ones: CPU cores, RAM, the graphics renderer, the resolution, and whether your CPU's hardware virtualization is even switched on. BlueStacks runs a full Android virtual machine on top of Windows, so those are the levers that actually move frames. Most of the "FPS boost" toggles people obsess over are cosmetic.
This guide separates the settings that move frames from the ones that just make you feel busy. No placebo, no magic numbers, just the mechanisms and the honest order to change them.
Why BlueStacks defaults are conservative, not optimal
BlueStacks ships defaults that have to run on a wide range of machines, including weak laptops with integrated graphics. So it plays it safe: a modest core count, a renderer chosen for compatibility over speed, and a frame cap that won't melt a thin-and-light.
Safe is not the same as best for your PC. If you have a real desktop CPU and a discrete GPU, the defaults leave performance on the table. The opposite is also true: cranking every slider on a 4-core laptop makes it stutter worse, not better. The right settings depend on your hardware, which is exactly why a blanket "best settings" list copied from a forum often disappoints.
The single biggest factor sits outside BlueStacks entirely, so start there.
Enable CPU virtualization before you touch anything else
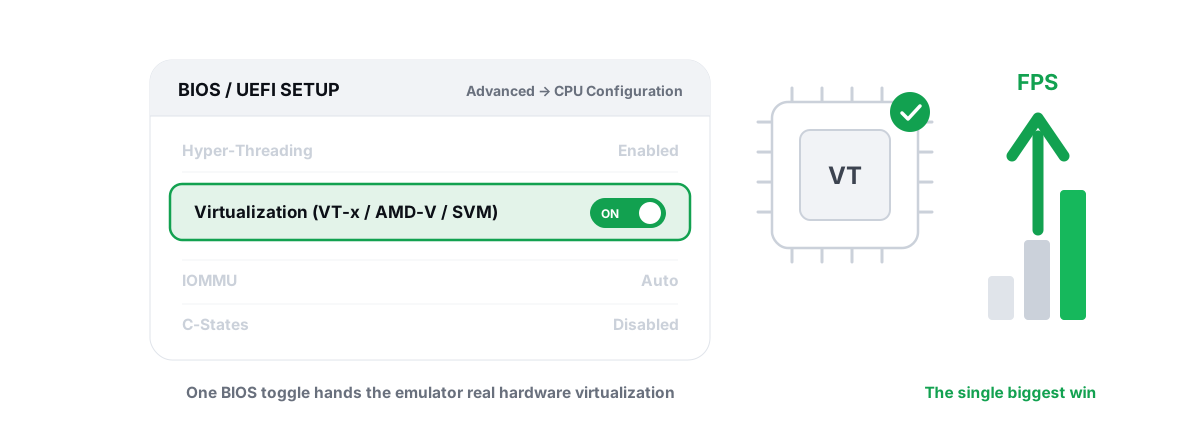
An emulator is a virtual machine. Intel VT-x or AMD-V/SVM lets your CPU run that VM in hardware instead of emulating it in software. With virtualization off, BlueStacks falls back to a slow path and you feel it everywhere: input lag, low frame rates, the works.
BlueStacks usually warns you when VT-x/AMD-V is disabled, but plenty of people ignore the banner. Reboot into your BIOS/UEFI and look for Intel VT-x / Intel Virtualization Technology on Intel boards, or SVM Mode on AMD boards. Turn it on, save, reboot.
On Windows 11, Hyper-V and the related virtualization features (VBS / Memory Integrity) can compete with BlueStacks for the hardware virtualization layer. BlueStacks has a Hyper-V-compatible mode now, but if you see a warning about it, that conflict is the cause, not BlueStacks being broken.
Performance tab: CPU cores and RAM that actually help
Open Settings > Performance. This is where the real levers live.
CPU cores
BlueStacks lets you assign CPU cores to the VM. More cores can help games that are CPU-bound, but there's a ceiling and a trap.
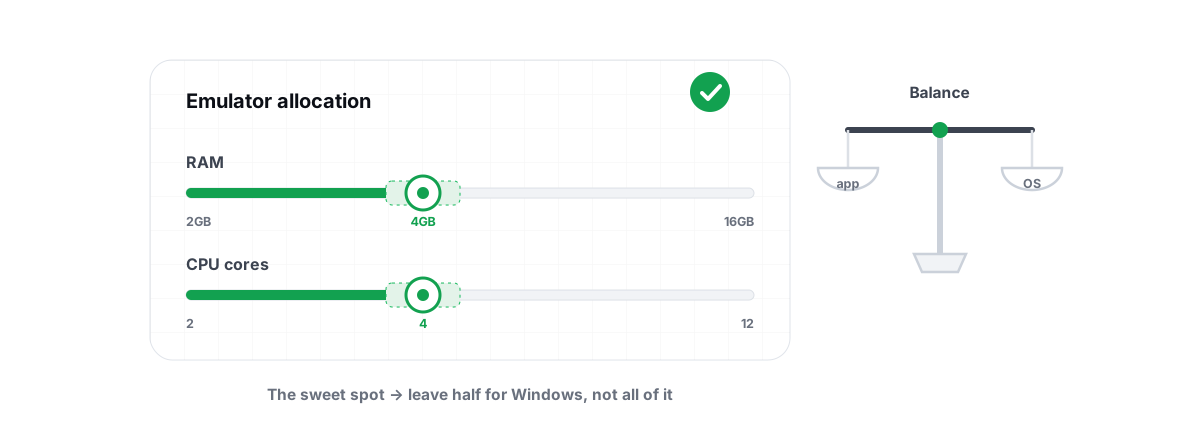
The trap: if you give BlueStacks all your cores, Windows and the GPU driver still need CPU time, so you create contention that causes stutter. On a 6-core/12-thread chip like a Ryzen 5, leave headroom and assign 4 cores, not 6. On an 8-core chip, 4 to 6 is the sweet spot for most mobile titles. Mobile games rarely scale past 4 cores anyway.
| Your CPU | Cores to assign | Why |
|---|---|---|
| 4 cores / 4-8 threads | 2-3 | Leave room for Windows and the driver, or you'll stutter |
| 6 cores / 12 threads | 4 | Most mobile games don't use more; keeps the system responsive |
| 8+ cores | 4-6 | Diminishing returns past this for mobile titles |
RAM allocation
The performance panel also sets how much RAM the VM can use. Match it to the game, not to "as much as possible." A typical mobile game runs fine in 4 GB; heavy ones (Genshin-class) like 6 GB. Giving BlueStacks 8 GB on a 16 GB machine starves Windows and your browser, which causes paging to disk and the exact stutter you were trying to avoid.
Performance mode and ABI
There's a "High performance" preset that bumps cores and RAM in one click, fine as a starting point, but verify the numbers it picked against the table above. Also leave the instance on the ABI (x86/ARM) the game expects; switching it for "speed" can break compatibility without helping frames.
Graphics renderer: OpenGL vs DirectX vs Vulkan
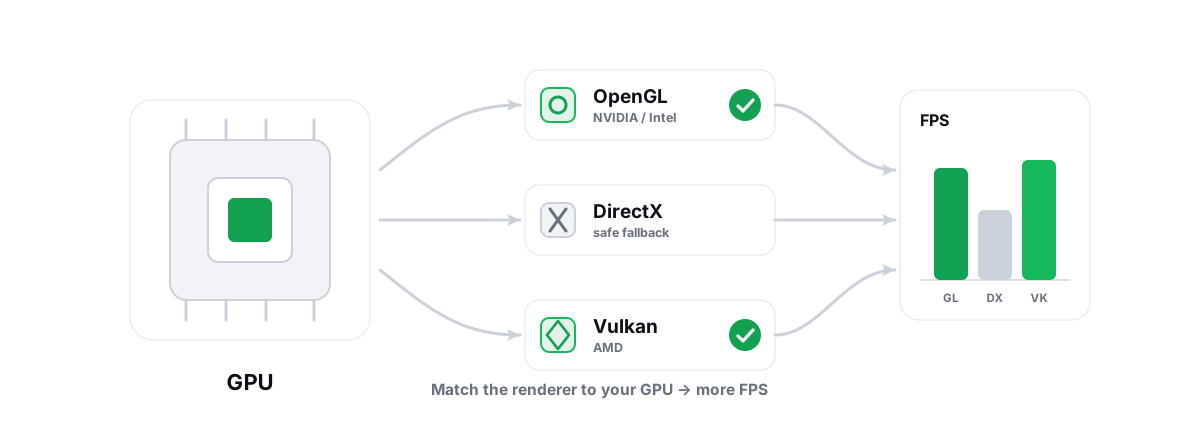
The renderer is the second-biggest lever after virtualization. BlueStacks translates the Android game's graphics calls to your GPU through one of these backends, and the best choice depends on your GPU vendor and the specific game.
| Renderer | Best for | Notes |
|---|---|---|
| OpenGL | NVIDIA, Intel, compatibility | Mature, broad game support; a safe default on GeForce and Intel graphics |
| DirectX | NVIDIA and mixed setups | Can be smoother in some titles; worth A/B testing |
| Vulkan | AMD Radeon especially | Lower-overhead API; often the win on Radeon, game-dependent |
There is no universally fastest renderer, and anyone who tells you otherwise is guessing. The honest method is to A/B test: pick one, load your game, watch the frame rate for a minute, switch, repeat. As a starting bias, NVIDIA and Intel users tend to do well on OpenGL (NVIDIA also on DirectX), and AMD users often gain from Vulkan because it has less driver overhead on Radeon. There's a deeper breakdown in choosing the best emulator renderer.
One more renderer setting: if BlueStacks offers a "GPU" vs "software" graphics engine choice, always pick GPU. Software rendering means your CPU is drawing every frame, which is exactly as slow as it sounds.
Frame rate cap: why 60/90/120 depends on your hardware
BlueStacks exposes a frame-rate slider, commonly 60, 90, 120, or higher. Raising it does not create performance; it just removes the ceiling. Whether you actually reach that number depends on your GPU, the game, and your monitor.
Two honest constraints:
- Your monitor's refresh rate. A 60 Hz panel physically cannot show more than 60 distinct frames per second. Setting BlueStacks to 120 on a 60 Hz monitor just burns GPU and generates heat for frames you'll never see. With a 144 Hz panel, 90 or 120 is worth it.
- The game's own cap. Many mobile games are hard-capped at 30 or 60 internally and ignore the emulator's higher number. Some unlock 90/120 only on specific devices or with an in-game high-FPS setting. The emulator slider can't override a game that refuses.
To know whether you're hitting the cap, you need a frame counter. BlueStacks shows an on-screen FPS readout in its display settings, and an anti-cheat-safe external overlay can confirm it independently. More on verification at the end.
ASTC textures and the toggles worth flipping
BlueStacks has an "ASTC textures" option (sometimes labeled hardware-decoded vs software-decoded). ASTC is a modern compressed-texture format many games ship. Hardware decoding offloads it to capable GPUs and saves memory; software decoding pushes that work onto the CPU and RAM.
On a modern discrete GPU, hardware ASTC decoding is generally the right call: less RAM pressure, less CPU work. On very old or integrated graphics that don't support it well, the software path can be more stable even if it uses more memory. Toggle it and watch for crashes or texture glitches in your specific game.
The other toggles actually worth touching:
- Display resolution / DPI. This is a genuine FPS lever. Higher resolution means the GPU draws more pixels per frame. Dropping from a high custom resolution to 1080p (or matching the game's native target) recovers real frames on a weaker GPU. Don't run 1440p in the emulator if your GPU is struggling; resolution is the most reliable performance dial you have.
- High FPS / 60+ mode in the game itself. The emulator can't force a game above its internal cap; the game's own graphics menu has to enable it.
Reducing PC-side contention before you blame BlueStacks
An emulator that stutters is often a victim, not the cause. If Windows is busy with background work, the VM gets starved of CPU and disk, and you get the choppiness people wrongly pin on BlueStacks.
The things that genuinely help, in order:
- Close the real RAM hogs. A browser with 40 tabs, Discord, and a download manager all compete with the VM. Free RAM beats any in-emulator memory tweak.
- Trim startup bloat. Background apps that auto-launch eat CPU and disk during your session. Disabling the ones you don't need is one of the few honest Windows speedups; see managing startup programs.
- Watch disk usage. If your drive sits at 100% while gaming, the VM is waiting on I/O. An emulator on a slow HDD stutters no matter how you set it; an SSD is a real upgrade here, covered in SSD vs HDD for gaming.
- Update your GPU driver, carefully. The renderer leans entirely on your graphics driver. A current driver can fix emulator-specific bugs. Do it the safe way: updating GPU drivers without breaking things.
Notice what's not on that list: registry cleaners, "game booster" apps that promise magic, and services-to-disable lists copied off a forum. Those are placebo at best and risky at worst. A clear, honest take lives in whether game booster apps actually do anything.
Letting BRUTAL apply a tier-aware profile and port QoS
Once the manual settings are dialed in, the repetitive part — matching emulator resolution, cores, RAM, and renderer to your hardware tier — can be automated. BRUTAL Optimizer's emulator tools detect BlueStacks (along with GameLoop, LDPlayer, Nox, MEmu and MuMu) and apply per-game profiles for titles like PUBG Mobile/BGMI, Call of Duty Mobile, Free Fire and Genshin Impact.
Those profiles are tier-aware: a LOW-tier laptop and an ULTRA desktop get different resolution, core, RAM and FPS targets, and the renderer guidance follows your GPU vendor — OpenGL/DirectX on NVIDIA, Vulkan on AMD, OpenGL on Intel. The profile also writes a network QoS DSCP policy for the game's ports, which can help your game traffic get prioritized on a busy connection.
On the Pro side, the Guardian background service auto-detects a running emulator, applies the matching profile, raises the emulator's CPU/IO/memory priority and timer resolution, then reverts everything when you close it. The free Module 9, "Emulator Performance Tuning", goes further into IFEO priority, GPU, DWM and VM tuning. None of this hooks the game or injects code; it's a user-mode wrapper over tools Windows already ships, which is why it's anti-cheat-safe and attempts a System Restore point before bigger changes, every setting change reversible.
Honest expectations: an emulator is heavier than a phone
No settings page changes physics. BlueStacks runs an entire Android OS inside a VM on top of Windows, so it always carries more overhead than the phone the game was built for. Good settings narrow that gap; they don't erase it. Expect a few to several more FPS and smoother frametimes from a proper renderer/resolution/core setup, not a doubling.
Two more honesty points worth stating plainly:
- Some games detect emulators on purpose. PUBG Mobile/BGMI places emulator players in emulator-only matchmaking, and a handful of titles restrict or ban emulator play outright. That's the game publisher's policy. No legitimate tool should "hide" your emulator to dodge that; masking an emulator is itself a ban risk, and it's not something a performance tool does or should do. More context in whether playing on an emulator is bannable.
- A phone may still be the better experience for some titles, especially anything with high-FPS modes locked to real devices. That's an honest trade-off, not a failure of your settings; see emulator vs phone for mobile gaming.
The biggest wins are free and live outside the settings menu: turn on VT-x/AMD-V in BIOS, give the VM enough but not excessive cores and RAM, pick the right renderer for your GPU, drop the resolution if your GPU is the bottleneck, and stop fighting Windows for resources. Everything else is fine-tuning.
Verifying the change instead of trusting a vibe
The cardinal sin of "optimization" is changing five things at once and declaring victory because it feels faster. Placebo is real, and it ruins your ability to know what actually worked.
Do it like a technician. Change one setting, then measure. An on-screen frame counter with frametime and 1% lows tells you the truth: average FPS hides stutter, but the 1% lows and frametime graph expose it. BlueStacks' built-in FPS readout works for a quick check; an external anti-cheat-safe FPS overlay that counts composition/present frames (no injection into the game) confirms it independently and shows the frametime spikes the average won't.
If you want the smooth-vs-stutter picture explained properly, fixing stutter and frametime spikes covers why a steady frametime matters more than a big average number. Measure before, change one thing, measure after. Keep what helps, revert what doesn't.
If you'd rather not do the measuring and per-game tuning by hand, BRUTAL Optimizer's free FPS overlay (1% lows and frametimes included) and its emulator profiles handle the busywork honestly: no fake booster meter, no kernel driver, every setting change reversible. But the settings in this article work whether or not you install a thing, and that's the point.
Frequently asked questions
What is the single biggest BlueStacks performance setting?
Enabling CPU virtualization (Intel VT-x or AMD-V/SVM) in your BIOS. It lets the emulator run its virtual machine in hardware instead of a slow software fallback, and it is usually the difference between unplayable and smooth. BlueStacks warns you when it is off.
How many CPU cores and how much RAM should I give BlueStacks?
Leave headroom. On a 6-core chip assign about 4 cores; on 8-plus cores, 4 to 6. For RAM, match the game (around 4 GB for most titles, 6 GB for heavy ones) rather than maxing it out, since over-allocation starves Windows and causes the stutter you were trying to avoid.
Which renderer is best in BlueStacks: OpenGL, DirectX or Vulkan?
There is no universal winner. NVIDIA users often do well on OpenGL or DirectX, while AMD Radeon users frequently gain from Vulkan due to lower driver overhead. The honest method is to A/B test each renderer with your game and watch the frame rate.
Does raising the frame-rate cap to 120 actually give more FPS?
No. The cap only removes a ceiling. You are still limited by your monitor refresh rate, your GPU, and the game's own internal cap. Setting 120 on a 60 Hz monitor just wastes GPU power on frames you cannot see.
Can I get banned for playing on BlueStacks?
Some games detect emulators on purpose. PUBG Mobile/BGMI puts emulator players in emulator-only matchmaking, and a few titles restrict or ban emulator play. That is the publisher's policy. Trying to hide or spoof an emulator to dodge detection is itself a ban risk, and a legitimate performance tool never does that.
Keep reading
 Emulators
Enable Virtualization for Emulator Speed: BIOS Guide
Enabling CPU virtualization in BIOS is the single biggest emulator speedup most people skip. Per-vendor steps plus the Hyper-V conflict nobody mentions.
 Emulators
Best Renderer for Emulator: OpenGL vs Vulkan vs DX
OpenGL, DirectX or Vulkan? The right emulator renderer depends on your GPU vendor. Here is the honest, GPU-aware way to choose and test it.
 Emulators
How Much RAM for an Emulator (and How Many CPU Cores)?
More cores and RAM usually makes an emulator slower, not faster. Here are the sane numbers per PC tier and how to verify them.
Stop guessing. Measure it.
BRUTAL Optimizer is the honest way to speed up Windows — 17 free modules, a real FPS overlay, verified disk cleanup and drive health. No kernel driver of our own, no game hooks, every setting change reversible.