Enable VT-x / SVM on Windows 11 24H2 (Why It's Greyed Out)
If your emulator runs at single-digit FPS and warns about "software rendering" or "VT-x is disabled," the fix is hardware virtualization. Here is how to enable VT-x / AMD-V (SVM) for an emulator on Windows 11 24H2 — where the toggle actually lives now, why Hyper-V and Memory Integrity quietly grey it out, and what to do when an OEM laptop won't let you flip it at all.
Why your emulator is stuck in slow software mode
Android emulators (BlueStacks, LDPlayer, MEmu, MuMu, GameLoop) run a virtual ARM/x86 Android machine on top of your real CPU. To do that fast, they need hardware-assisted virtualization — Intel calls it VT-x, AMD calls it SVM (Secure Virtual Machine, also labeled "AMD-V"). With it on, the CPU runs guest code almost natively. Without it, the emulator falls back to interpreting or binary-translating every instruction in software.
That software fallback is where the misery comes from. You'll see 5–15 FPS in a menu that should be smooth, the CPU pinned at 100% doing translation work, fans screaming, and the emulator nagging you to "enable VT-x in BIOS." It doesn't matter whether you're on a Ryzen 9000 or a six-year-old laptop chip — without the extensions, the fast path is gone. This isn't a tuning problem you fix inside the emulator's settings; it's a hardware switch that's off, or being blocked.
If you've already enabled virtualization and the emulator still crawls, the bottleneck is elsewhere — renderer, RAM, or core allocation. See fix emulator high CPU, GPU and disk load and how much RAM and how many CPU cores an emulator needs before you keep blaming the BIOS.
Enabling VT-x (Intel) / SVM (AMD) in BIOS
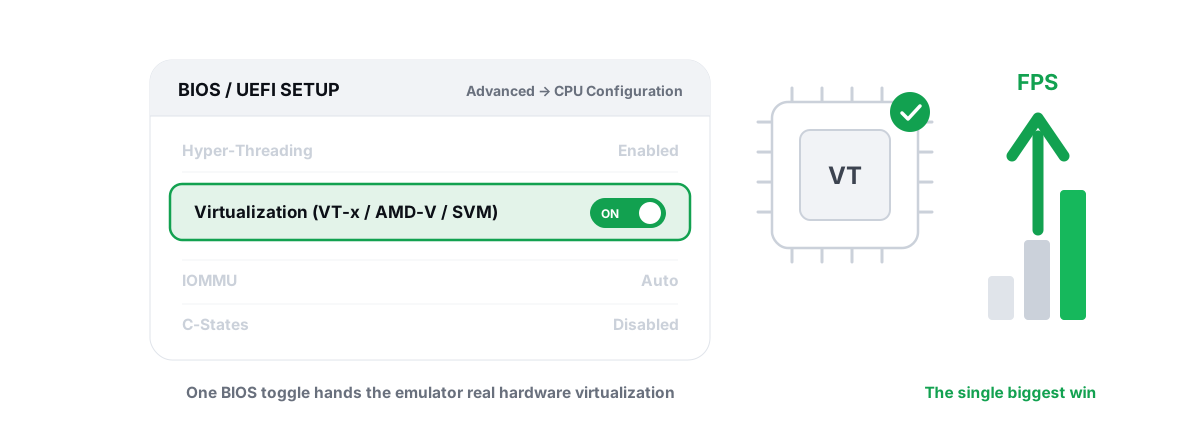
The setting lives in your motherboard firmware (UEFI/BIOS), not in Windows. You reach it by restarting and pressing a key during boot — usually Del or F2 on desktops, often F2, F10, or Esc on laptops. The exact key flashes on the manufacturer logo screen.
What you're hunting for depends on your CPU:
| CPU vendor | Setting name | Usually found under |
|---|---|---|
| Intel | Intel Virtualization Technology / VT-x (sometimes "VMX") | Advanced → CPU Configuration |
| Intel (extra) | VT-d (directed I/O — enable too if present) | Advanced → System Agent / CPU |
| AMD | SVM Mode (a.k.a. AMD-V) | Advanced → CPU Configuration, or OC → CPU Features |
Set it to Enabled, then save and exit (usually F10). The naming varies wildly by brand — ASUS, MSI, Gigabyte, and ASRock each bury it in a slightly different submenu, and laptop OEMs (Dell, HP, Lenovo) often rename "CPU Configuration" to something like "Security" or "Virtualization Support." Use your BIOS search box if it has one.
For a full walk-through of the desktop case including how to confirm your CPU even supports it, our older BIOS virtualization guide covers the basics. This article focuses on what's new and confusing about 24H2.
The 24H2 UEFI / Settings path
On Windows 11 24H2 you don't have to gamble on catching the boot key. Windows can reboot you straight into the UEFI firmware:
- Open Settings → System → Recovery.
- Under Advanced startup, click Restart now.
- After it reboots, pick Troubleshoot → Advanced options → UEFI Firmware Settings → Restart.
That lands you in your BIOS without timing a keypress. From there, find the VT-x/SVM setting as described above. A faster route if you live in the terminal: run shutdown /r /fw /t 0 from an elevated Command Prompt or PowerShell — the /fw flag tells the firmware to open its setup screen on the next boot.
One genuinely new 24H2 wrinkle: on many machines Windows now ships with virtualization-based security (VBS) and Memory Integrity active out of the box, especially on clean installs and new PCs. That's the gotcha that makes the BIOS setting look like it "didn't work." More on that next.
Why the option is greyed out: Hyper-V occupies VT
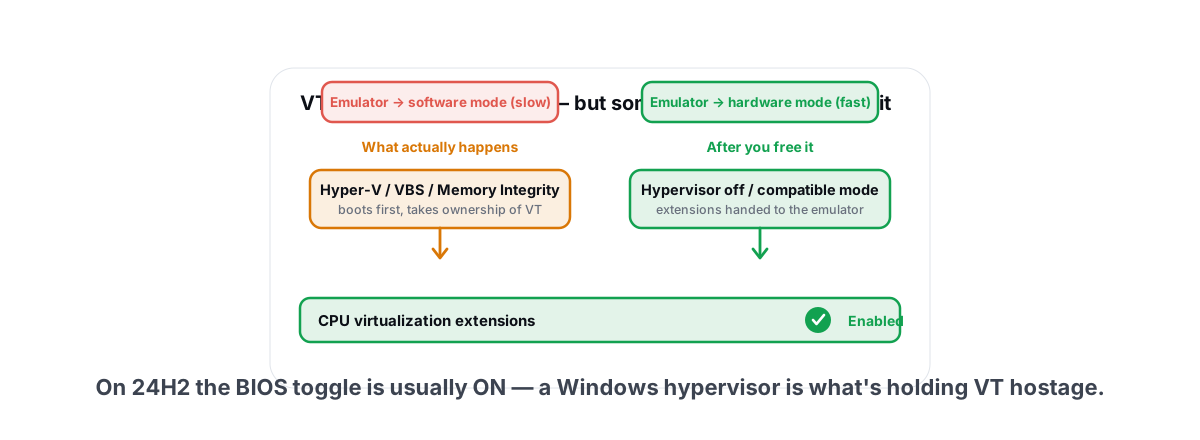
Here's the part that trips up half the people searching for this. You go into BIOS, VT-x/SVM is already Enabled — yet the emulator still complains, or the in-BIOS toggle itself is greyed out and won't change. The cause is almost always a Windows hypervisor sitting on top of the hardware.
When Hyper-V, the Windows Hypervisor Platform, the Windows Subsystem for Android remnants, Virtual Machine Platform, or VBS/Memory Integrity is enabled, Windows boots its own thin hypervisor (Hyper-V) first and takes ownership of the CPU's virtualization extensions. Your emulator then has to share through a slower compatibility path — or refuses to use hardware acceleration at all and drops to software mode. The hardware feature is on; something else already claimed it.
VT-x/SVM enabled in BIOS but the emulator still says it's off almost always means a Windows hypervisor (Hyper-V / VBS / Memory Integrity) got there first.
Current BlueStacks and MuMu builds ship a "Hyper-V" or "compatible" mode that coexists with the Windows hypervisor, and it runs acceptably. But native (non-Hyper-V) mode is still faster on most setups, so the clean fix is to free the extensions. To see what's loaded, open msinfo32 (System Information) and read the bottom of the Summary page — "A hypervisor has been detected. Features required for Hyper-V will not be displayed" means a hypervisor owns VT.
To turn the Windows hypervisor off:
- Open Turn Windows features on or off and uncheck Hyper-V, Windows Hypervisor Platform, Virtual Machine Platform, and Windows Sandbox if present. Reboot.
- If the emulator still detects a hypervisor, disable hypervisor launch at boot from an elevated prompt:
bcdedit /set hypervisorlaunchtype off, then reboot. (To undo:bcdedit /set hypervisorlaunchtype auto.)
Memory Integrity holding virtualization hostage
Memory Integrity (officially "Core Isolation → Memory Integrity," part of VBS/HVCI) is the most common 24H2-era culprit, because Microsoft now enables it by default on a lot of new machines. It runs on the Windows hypervisor, which means as long as it's on, the hypervisor is loaded and VT is occupied — even if you never touched Hyper-V yourself.
Turn it off in Windows Security → Device security → Core isolation details → Memory integrity → Off, then reboot. If the toggle is greyed out and says an incompatible driver is blocking it, that's a separate (driver) issue, but the practical effect is the same.
There's a real security trade-off here. Memory Integrity blocks a class of kernel-level malware by verifying drivers in an isolated context. Disabling it for emulator performance is a deliberate choice, and you should make it knowingly. We wrote a full honest breakdown in should you disable VBS for gaming on 24H2 — read it before you flip the switch, because the FPS gain in real PC games is usually small while the emulator gain can be large.
In BRUTAL Optimizer the VBS/HVCI control is one of the five Pro low-latency modules, and it's reversible — a per-module undo, with a System Restore point attempted first. You can test the difference and roll it back if it wasn't worth it. The manual steps above do the same job; the app just makes the on/off and the undo one click each.
BIOS-locked OEM laptops: the hard cases
This is where some people hit a wall. On certain prebuilt and laptop systems, the virtualization setting is missing entirely, locked, or greyed out in the firmware itself — not by Windows. Common causes:
- Vendor-locked firmware. Some budget laptops and OEM boards (and a number of older HP, Acer, and Lenovo consumer models) simply don't expose VT-x/SVM, or hide it behind an undocumented menu. There may be nothing you can change in the visible UI.
- Outdated BIOS. The toggle was sometimes added in a later firmware revision. A BIOS update can expose it — but updating firmware carries real risk. Read should you update your BIOS first; don't flash one just on a hunch.
- OEM "supervisor" lock. Business laptops can have the option present but greyed out until a BIOS supervisor/admin password is set, after which it becomes editable.
- Genuinely unsupported CPU. Very old or heavily cut-down chips may lack the feature. Check the CPU model's spec sheet on the vendor site — if it lists VT-x/AMD-V as not supported, no tweak will conjure it.
If your firmware truly won't let you enable it, your realistic options are: use a lighter emulator that tolerates software mode better, drop to lower in-game settings, or accept that this machine isn't a great emulator host. A weak or locked laptop is a hardware limit, not a settings problem — our guide to running an emulator smoothly on a laptop covers how to get the most out of a constrained system, and the best emulator for a low-end PC lists picks that hurt less without VT-x.
Verifying virtualization is actually on
Don't trust the BIOS label alone — verify from inside Windows, because as we covered, a hypervisor can be sitting on top of an "enabled" feature. Two quick checks:
- Task Manager → Performance → CPU. Look at the "Virtualization" line.
Enabledmeans the hardware feature is active and free for apps. If it readsEnabledbut your emulator still falls to software, a hypervisor is the issue (go back to the Hyper-V/Memory Integrity sections). - systeminfo. Run
systeminfoin a terminal and scroll to the Hyper-V Requirements block. "Virtualization Enabled In Firmware: Yes" confirms BIOS is set. If "A hypervisor has been detected" appears instead, the hypervisor took ownership — that's your answer.
The most reliable final test is the emulator itself: open its engine/settings panel and confirm it reports "VT/virtualization: enabled" and is using its hardware (not software/compatibility) backend. Once that's green, you've solved the actual problem — the FPS counter will tell you the rest.
If you want a non-injecting way to watch the result, an anti-cheat-safe overlay that reads the Windows display present rate (no hooks) will show your real emulator FPS and 1% lows so you can confirm the jump from software to hardware mode is real, not imagined. That's exactly what BRUTAL Optimizer's free FPS overlay does, and it runs alongside Vanguard, EAC, and BattlEye without touching the game.
Reversing it cleanly
Everything here is reversible — that's the point of doing it carefully. To put your system back exactly as it was:
- VT-x/SVM: reboot into BIOS and set it back to Disabled (most people leave it on — it's harmless when idle).
- Hyper-V: re-check the features you unchecked in "Turn Windows features on or off," or run
bcdedit /set hypervisorlaunchtype autoand reboot. - Memory Integrity: turn it back on in Windows Security → Device security → Core isolation, and reboot. If you handle banking or work accounts on this PC, do turn it back on when you're done.
These are the kinds of system changes that bite when done sloppily, so take a restore point before you start — here's how, and why it matters. Then change one thing at a time and re-test, instead of flipping five switches and guessing which one helped.
Want the whole virtualization-and-latency stack handled honestly without breaking anything? Optimize Windows for gaming safely ties it together. And if you'd rather not memorize BIOS menus and bcdedit flags, BRUTAL Optimizer ships the VBS/HVCI control and a free, hook-free FPS overlay to confirm the gain — every setting change reversible, a restore point attempted first, no kernel driver, so it sits quietly next to your anti-cheat. The manual steps above work fine on their own; the app just makes the test-and-undo loop one click each way.
Frequently asked questions
VT-x is enabled in BIOS but my emulator still says it is off. Why?
A Windows hypervisor got there first. Hyper-V, Virtual Machine Platform, or Memory Integrity (VBS) boots its own hypervisor that claims the CPU virtualization extensions, forcing the emulator into software mode. Disable Hyper-V and Memory Integrity, then reboot.
How do I open BIOS to enable virtualization on Windows 11 24H2?
Go to Settings, System, Recovery, then Advanced startup, Restart now. After reboot pick Troubleshoot, Advanced options, UEFI Firmware Settings, Restart. Or run shutdown /r /fw /t 0 from an elevated prompt to boot straight into firmware.
Is it safe to disable Memory Integrity to speed up my emulator?
It is a deliberate trade-off. Memory Integrity blocks a class of kernel malware, so disabling it lowers that protection. For emulator speed the gain can be large, but turn it back on when you handle sensitive accounts. The change is fully reversible.
The virtualization option is greyed out or missing in my laptop BIOS. What now?
Some OEM and budget laptops lock or hide VT-x/SVM in firmware. A BIOS update may expose it, setting a supervisor password can unlock it, or the CPU may simply not support it. Check your CPU spec sheet before assuming a tweak exists.
How do I verify virtualization is actually on?
Open Task Manager, Performance, CPU and check the Virtualization line reads Enabled. Or run systeminfo and read the Hyper-V Requirements block. If it says a hypervisor has been detected, a hypervisor owns VT and you need to free it.
Keep reading
 Emulators
Enable Virtualization for Emulator Speed: BIOS Guide
Enabling CPU virtualization in BIOS is the single biggest emulator speedup most people skip. Per-vendor steps plus the Hyper-V conflict nobody mentions.
 Emulators
How to Run an Emulator Smoothly on a Laptop
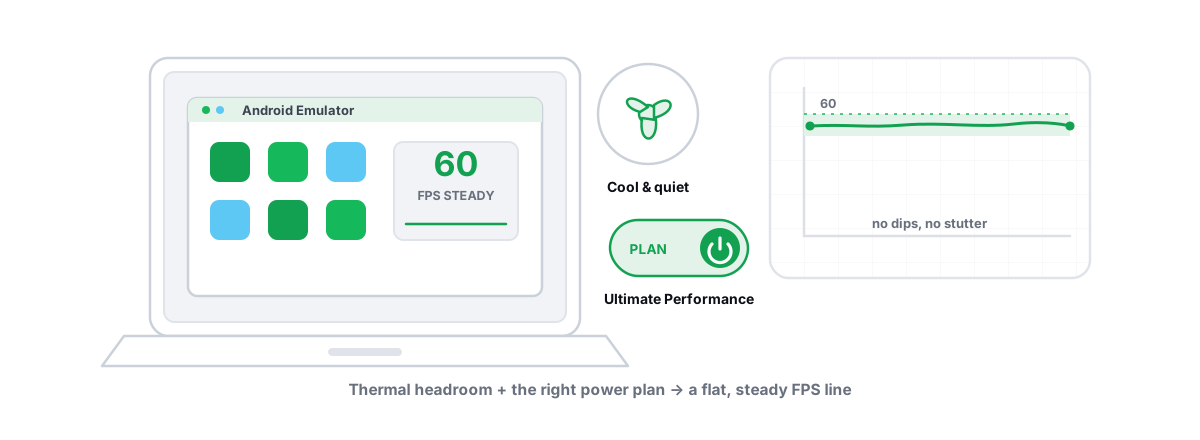
Beat laptop emulator lag the right way: stop battery and thermal throttling, force the discrete GPU, and right-size cores and RAM.
 Emulators
Fix Emulator High CPU Usage, GPU and Disk Load
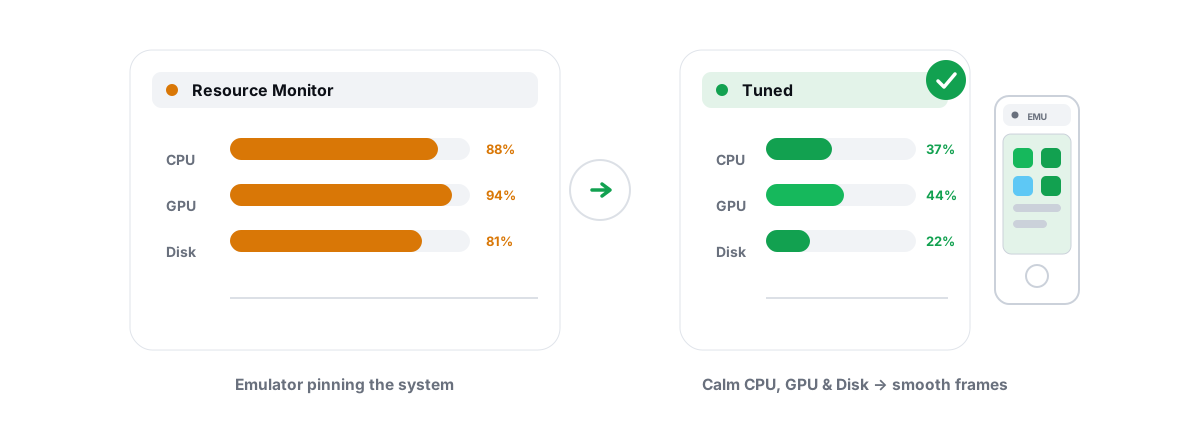
Tell normal emulator VM load from a real problem, then fix the true cause of high CPU, GPU and disk usage.
Stop guessing. Measure it.
BRUTAL Optimizer is the honest way to speed up Windows — 17 free modules, a real FPS overlay, verified disk cleanup and drive health. No kernel driver of our own, no game hooks, every setting change reversible.